Showing posts with label diy. Show all posts

May 6, 2024

Grasscloth Wrapping

Fact: I would wallpaper every single wall (and ceiling) of my home.
Also Fact: I'm married & have a budget.

White walls do not showcase my personality; not even close! I'm a cheerful, dynamic and full of enthusiasm which means color, prints and textures are key in having our home reflect who we are (ok more me than him). 
I also have a very traditional and classic style that suits wallpaper beautifully.


I have already papered our dining room with cranes and our foyer with hydrangeas but the formal living room in between just fell flat.  I chose to wrap this room in a whisper blue grasscloth paper that adds just the right amount of subtle compliment.

BEFORE


AFTER


The BEST part of this project was the gal that hung the paper! She's a very dear friend that generously shared her talents and did a beautiful job of adding beauty to our home! 

Here are some close ups. This paper is actually a faux grass cloth in a peel & stick application. I find it's a pretty option for adding color and dimension to your walls.
Bonus: you can easily remove it with no consequence! 


It pairs so nicely with the adjacent rooms & papers.


One of my favorite outcomes was how our dental crown molding shines! 


I wish I could share the tips, tricks and tools you'd need - but I bet you have talented friends like mine and together you can have a blast wrapping your walls!


I chose color Whisper Blue

I may add some art and drapes! 

Dress Your Walls Beautifully with Grasscloth Wallpaper

XOXO Sarah Louise

Feb 19, 2024

Built-In Bourbon Bar

 When we purchased our home over 5 years ago, Ryan was very enthusiastic about having a room dedicated for his work and things. A manly room all to himself. Well, he's married so the reality is I'm going to go in there and zhoosh things around and add decorative touches.  He finds this very offensive but  has endured.


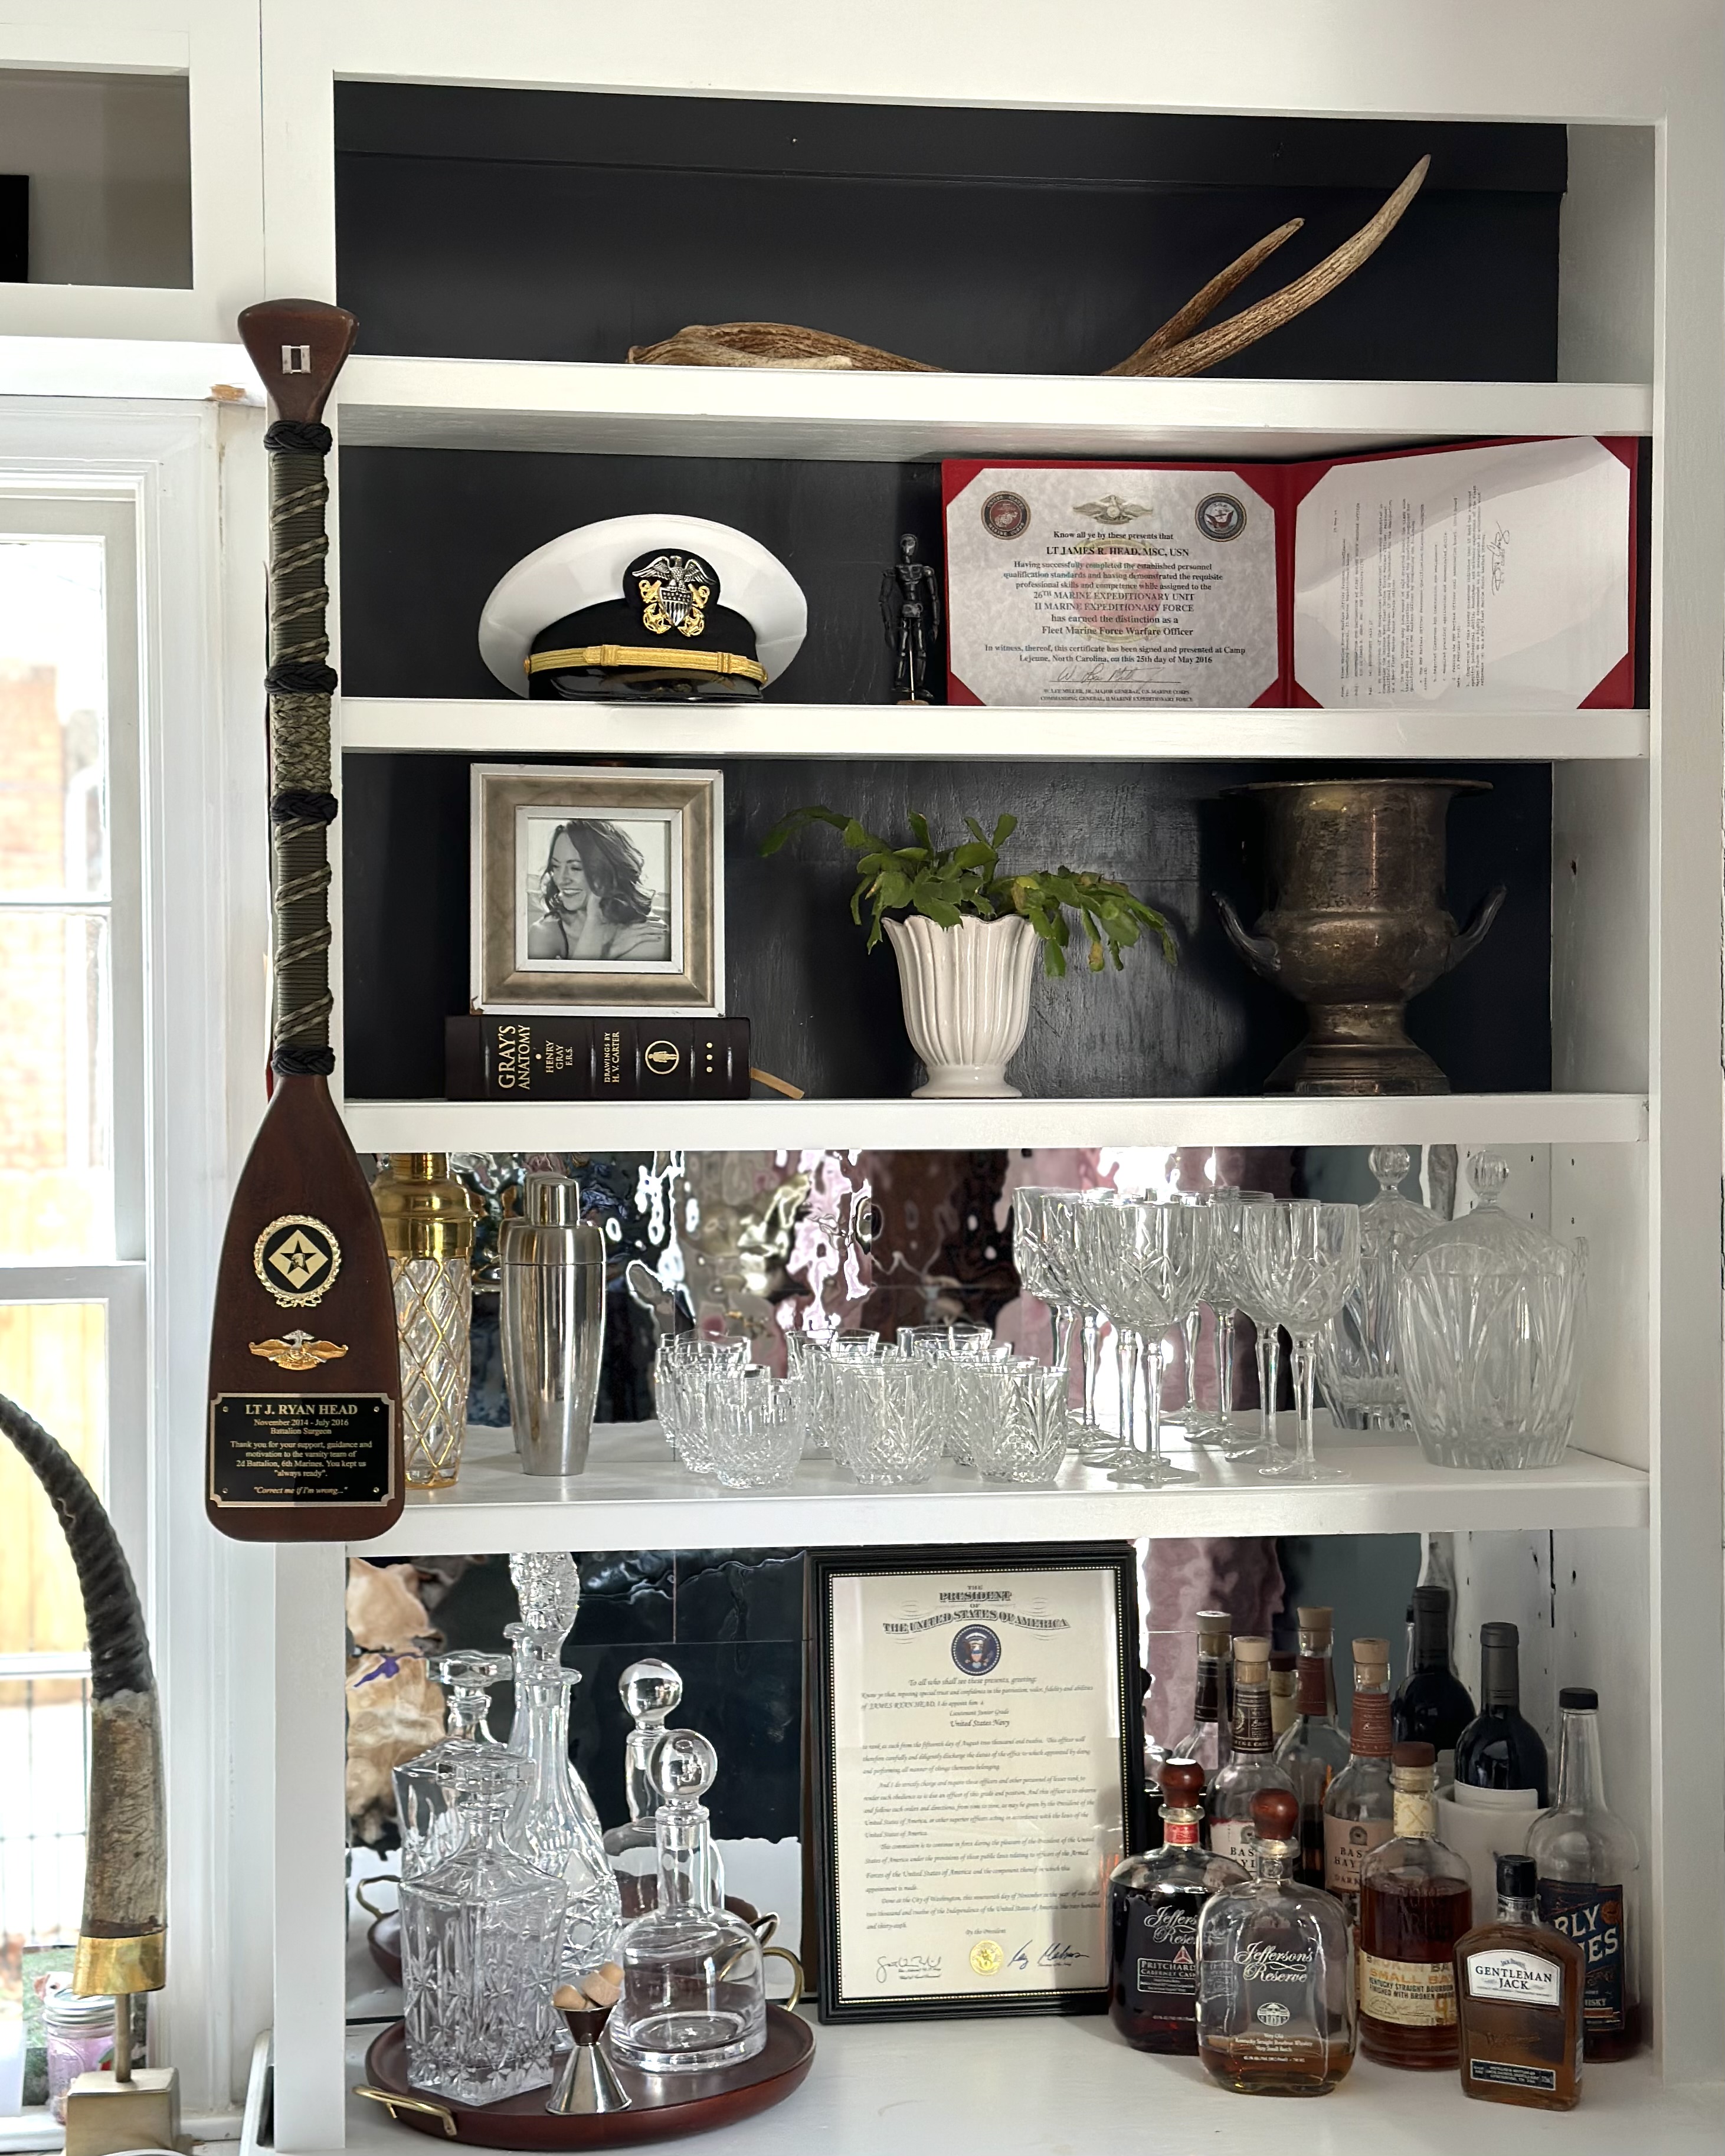
His room, the front office, has builtins on one wall that serves as a desk, adds storage and has shelves for display. As I've been slowly decorating his space with a new rug and dark moody paint, I had the idea to turn one side of the shelves into a bourbon bar. 


Ryan loves bourbon and has started quite the collection.

Originally these built ins were stained wood that we had painted white prior to moving in. I then went in and painted the backs a dark charcoal color - Wrought Iron by BM. 


To make this bourbon bar I wanted an antique mirrored backing but I couldn't find mirrored tiles in my budget and they were also fragile and required tools to install.
I found peel and stick mirrors that were the perfect solution.
Turns out when my gal pal and I were putting up the faux mirrors, due to the texture of the wood backing there was a rippling appearance that gives an antique look (WIN!)


I added decanters purchased from vintage shops and home goods.


The Waterford crystal glasses belonged to Ryan's dad that he purchased in Italy while on a deployment in the military. They're very special.


I added sentimental pieces from Ryan's time as a medical officer in the US Navy that are very important to him as layers of decor. 


And there's always Trixie, his beloved puppy that sits in what used to be Ryan's dad's chair and watches all the birds, cars and other puppies. She never lets me miss a delivery!

I'm far from a DIY gal but I will say this quick project was easy and a lot of fun to do with a friend.
You could use any type of bookcase or shelving to recreate this.


Dress Your Home Beautifully with a Bourbon Bar

XOXO Sarah Louise

Sep 19, 2022

Pop of Paint


I love decorating our home! It's where we make a great deal of our memories so I want it to be beautiful and represent us, the people who live here. On the other hand, I'm not so fond of DIY projects but I can brush on a coat of paint (just please don't look too close!).

This room is our den. When we purchased this home this room had brown paneling, a tan ceiling and very dark brown trim and doors. We had it ALL painted prior to moving in. 
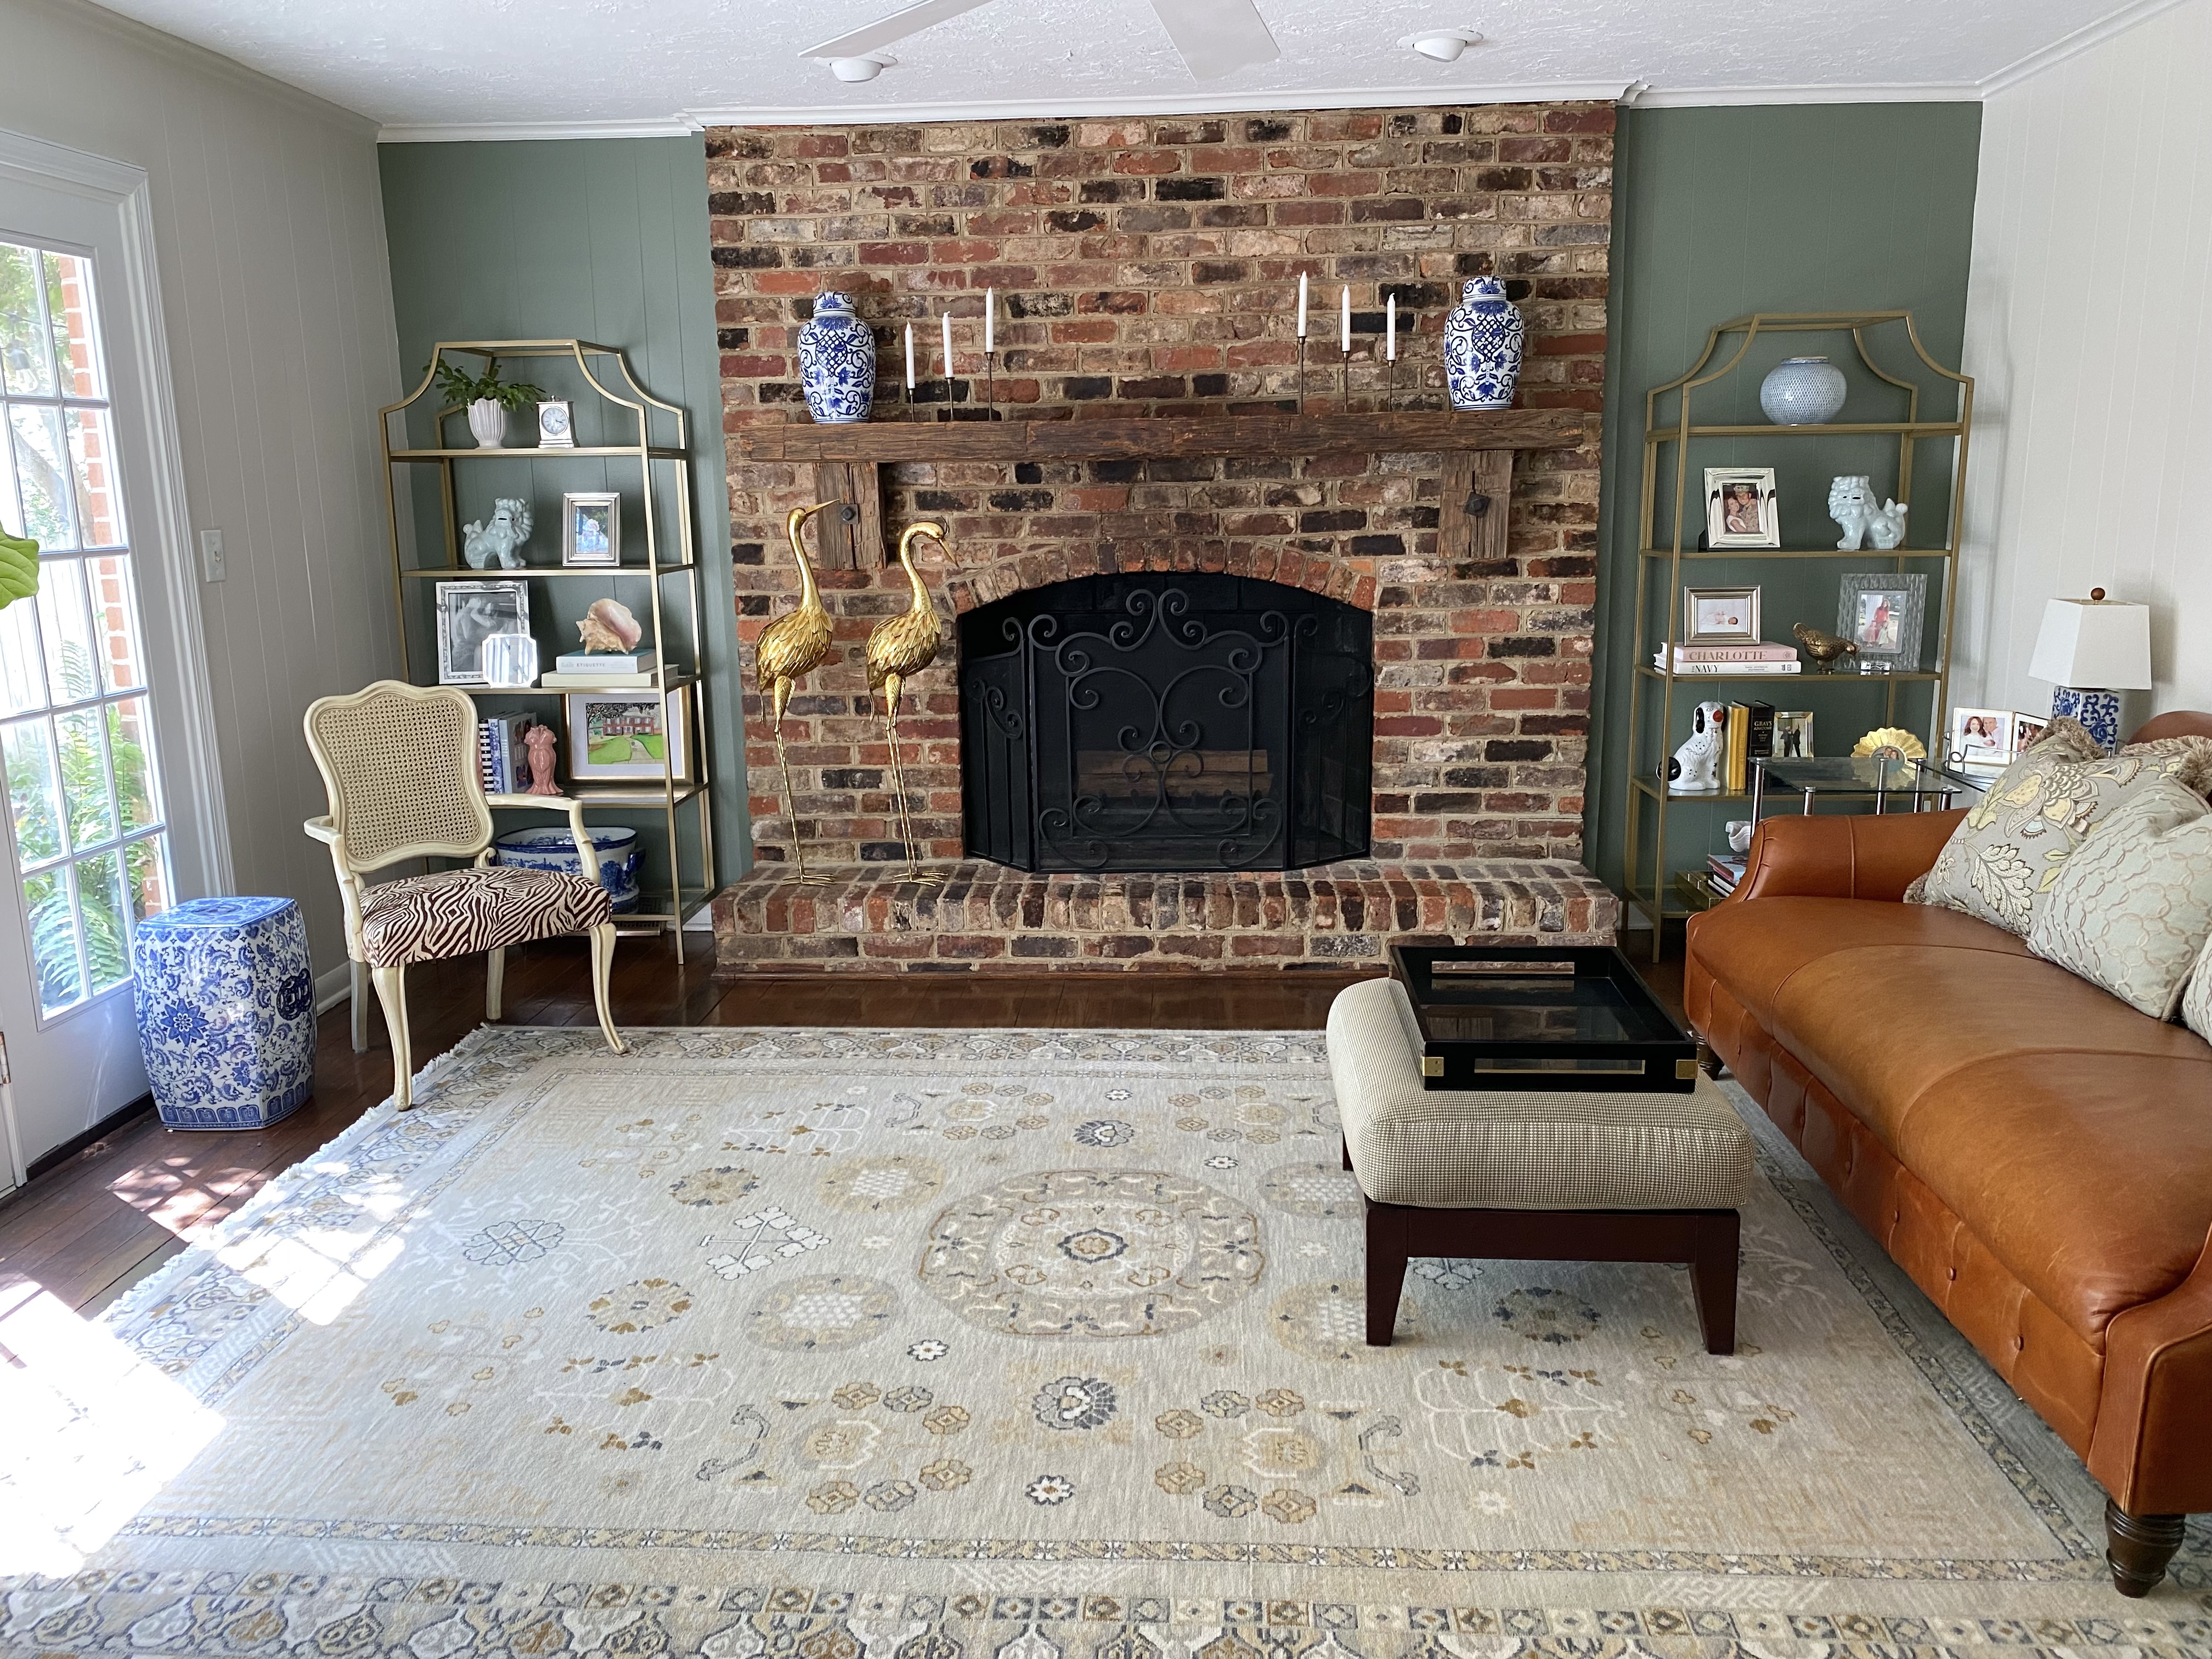
But it's still felt flat and lacking to me over the years. I got the idea to just add color to the walls flanking the fireplace to add depth and some green. I love green. 


BEFORE

Gracious my darling girl has grown! 
This was 2 years ago


AFTER


This deeper green really makes the shelves stand out! 


Rather than paint an entire room, I encourage you to find nooks, and accent walls where you can add dimension with some color.

Accent wall color: Magnolia 'Eden'
Wall color: Classic Gray (it's NOT gray at all but a cool white)

Dress Your Home Beautifully with a Pop of Paint

XOXO Sarah Louise

Oct 5, 2020

Mamma Monday: Sensory Box

 Happy Monday Mammas! You've probably heard of these snazzy boxes of fun termed 'sensory box'.  I'm going to be honest, I used to roll my eyes at them and their fancy title thinking they were an overachieving way for kids to play. I also shunned them because all I saw was a mess! #hardno

Turns out they actually are purposeful and the best part, they entertain your child for a VERY long time! I stand corrected and praise the box! 


Last week one of the Mammas in my MOPS group who's an OT shared with us about sensory therapies and how these boxes make an impact on development. She brought supplies for us to make a box to bring home to our littles.  

I drank the Kool aid gals! I'm far from a crafty Mamma but after Vivian played with the box it got me thinking about making seasonal/occasional boxes for her. 
So I went to the dollar store and target  (mamma's best friends) and picked up all kinds of trinkets to create a halloween themed box.  I'm going to make a couple extras for her cousin and a friend.
I'm already scheming a Christmas box with bells in it!


Now, the gal behind Busy Toddler has amazing ways to create activities for your little.  I also recently discovered this company, who has sensory kits and a monthly subscription option that would be a great gift.


While Vivian doesn't seem to have sensitivities, I'm using these boxes to work on counting and sorting. And she has a ball searching and scooping!

I prefer for us to play with the sensory boxes outside on a blanket. Less mess and I enjoy everything more outside. 

These are great to have for babysitters and grandparents!


To make one of these all you need is a container (Tupperware is great), a base: beans, pasta, confetti, (Some gals use sand, rice and lentils but that's just too much mess for me) and things to mix in: small toys, beads, pom poms, blocks, basically any small trinkets you find. Get creative, I even threw in those plastic tops from the pouches she eats.

Feeding a toy rhino a bean :)

If you want to get extra sensory, you can boil and even dye spaghetti or use jello.  You could start by hiding toys in large ziplock bag first then try a container. 

These sensory boxes are surprisingly fun to make and so enjoyable for your littles as they play and learn.
Even if you don't have kids, they make great gifts for nieces/nephews and friends.


Dress Your Play Time Beautifully

XOXO Sarah-Louise

Apr 28, 2020

Transformation Tuesday: Family Room


Welcome to our family room.  This room is more informal as we do not host in here.  It is in the back of our home leading out onto our patio.  It is also off of our kitchen/breakfast room which is convenient as Vivian can play in here and I can see her while I prepare meals.  We have a small table and chairs for her in one corner and a toy chest on the opposite wall seen here.
This room houses pieces of furniture from our previous homes that while not designed intentionally, serve well for now.


I love the large fireplace and the variations of colors in the brickwork.  I don't care for the mantle and hardwood stain as they are too dark and rustic for my taste but that seems to be everyone's favorite when they visit. I will be replacing and staining them both along with all new lighting.

We plan to install custom built in cabinets with shelving on both sides of the fireplace when we update our kitchen.  We will be opening up the wall between the two spaces so in efforts to create continuity of the design we want the cabinetry in both areas to match.

Until then, these glass etageres are great place holders! They serve well for displaying decor and photos of us, contrasting the dark elements with shiny gold trim and keeping the room light with the glass shelves.

I styled them symmetrically with a gold vs silver motif.  I used items around my home and the pictures speak to us and the memories of our life.  Naturally, you'll see blue and white porcelain as it's the color scheme throughout our home.
I also love having live plants in every room.  They add life and remind me of God's creation.

When these etageres are no longer needed they will easily be useful in a bedroom, office, hallway, bathroom or closet.  They don't have a large foot print so they can be used in practically any space.


This room originally had dark brown paneling, stained trim and a tan ceiling. UGH
When we were purchasing this home we referred to this room as the dungeon den! It was so dark and very very brown! We had it ALL painted and gracious you couldn't help but say 'let there be light!' when it was completed.
We also ripped down the blinds immediately so that we could see the beautiful outdoors clearly through the windows and door.


BEFORE


We enjoy the sunshine, views of our backyard and have a lot of fun playing with Vivian in this room. In future years this room will be where she hosts her pals without infringing on our more formal spaces with her belongings/activities or disturbing the adults should we also be hosting.
The direct access to the patio and backyard is one of my favorite things!


I hope you've enjoyed seeing some of the transformations in our home this month.
I plan to do it again this Summer showcasing our foyer, dining room, powder room and kitchen.
Spoiler alert: there will be lots of beautiful wallpaper :)

Dress Your Home Beautifully with Paint & Etageres

XOXO Sarah-Louise

Apr 21, 2020

Transformation Tuesday: Home Office

A must have with our home was a room for Ryan to call his own.  He dedicates a portion of his free time to studying medicine (love that he's an over achiever and wants to be the best he can be) and needs a space to do that. And as tacky and annoying as it is, he has 'stuff'.  It's comprised of mostly mementoes from his love of his undergrad alma mater Chapel Hill, medical schooling, golf and his time serving in the US Navy. I'm embarrassed to share that he would have taped posters and knick knacks everywhere if I didn't intervene. He huffs and puffs at my involvement in his room but I refuse for it to look like a college dorm! 

Disclaimer:  I did not get free rain to style this room but we did compromise slightly. 

Prior to making his mark we had to put some 'lipstick on this pig' and by lipstick I mean paint.


We were not fans of these built-ins however we had to do something to spruce them up until we decided on a design plan for this front room.
We had painters overhaul practically every surface in our entire home prior to moving in (best decision ever!!!) and that included a bright white over all this brown stain.

Note: I fully respect DIY but it truly isn't for me. The professionals knocked this out in no time. 

We also had crown molding added. I've shared before, moldings are everything to me in a home.  It's one of the MOST important details, in my opinion.  Unique moldings are huge appeal in our decision to purchase older homes. With all the custom moldings throughout this home it is beyond my understanding why the prior owners removed the moldings in this room when installing these built-ins.


A very brown before


While the fresh coat of paint really packed a powerful punch it was very one dimensional so I decided to roll up my sleeves and add some contrast by painting the back wall of the shelves.  Thank goodness the selves are adjustable so I could take them all out.

I wanted this room to have a very masculine style because I knew the rest of our home was going to have a lot of feminine colors and prints.  He deserves to have one space that feels like him.

I chose a dark charcoal color. I almost went with a super dark navy/ink color but I wanted it cooler and more neutral.
Painting with a dark color isn't easy so there are some edges that aren't perfect but we aren't keeping these very long and no one should be looking too closely.

Paint Colors
Built Ins & Trim: Chantilly Lace
Shelving Back Walls: Wrought Iron
Walls: Classic Gray


This room and our den house leftover mismatched furniture that serves as filler pieces to get us by until we implement a more permeant design.  While I'm often insecure about these rooms, our home is not a magazine spread but a place where memories are made and laughter shared.

In the future we will remove theses built-ins and replace the lighting.  Adding a desk will have a smaller foot print allowing this room to also serve as a second guest room with a sleeper sofa or maybe we'll go modern with a Murphy bed! In our home we believe the more the merrier!

Dress Your Home Beautifully with a Fresh Coat of Paint

XOXO Sarah-Louise

Apr 7, 2020

Tuesday Transformation: Sunroom

 ‘Your home should reflect who you are’, such a true statement but it has held me back from sharing ours and hosting b/c it’s not designed just how we want it yet. (I’m talking lots of wallpaper, gold fixtures and a dream kitchen for Ryan - Lord knows it’s not for me). 
You know what else is true ‘Home is where the heart is’ and there’s a lot of love in ours. Every Tuesday this month I’m sharing small updates we have made until we can call in the big guns for renovation.  We love our home and intend for it to be our forever place. Ryan says we aren't moving again until the old folks home. We want to make a lot of changes so that it does in fact reflect who we are.


Here's the reality, renovations and design come at a cost. The appeal of our home was that it was a classic, extremely well built colonial that just needed love, and we wanted the opportunity to pick out all the design elements of our spaces. Outside of the master bedroom, bath and closet this house was all outdated. We've spent the past year and a half living here investing in structural and functional repairs as well as extensive landscaping. This is the not the fun part of home ownership. #adulting

We are so ready to work on our interior, the places people actually see rather than our crawl space.
Again, there's the cost element UGH!

Note: Prior to getting married Ryan & I agreed on our financial model of living on 1 income and only financing our home (as little as possible) and one vehicle at a time (and hopefully have some years with none).

Neither of us are DIY people, and honestly we both want classic and quality design that just can't be achieved outside of the experts. However, we have managed to add some pretty touches.
Since we are all at home, I find that this is a good time to share some of these updates!

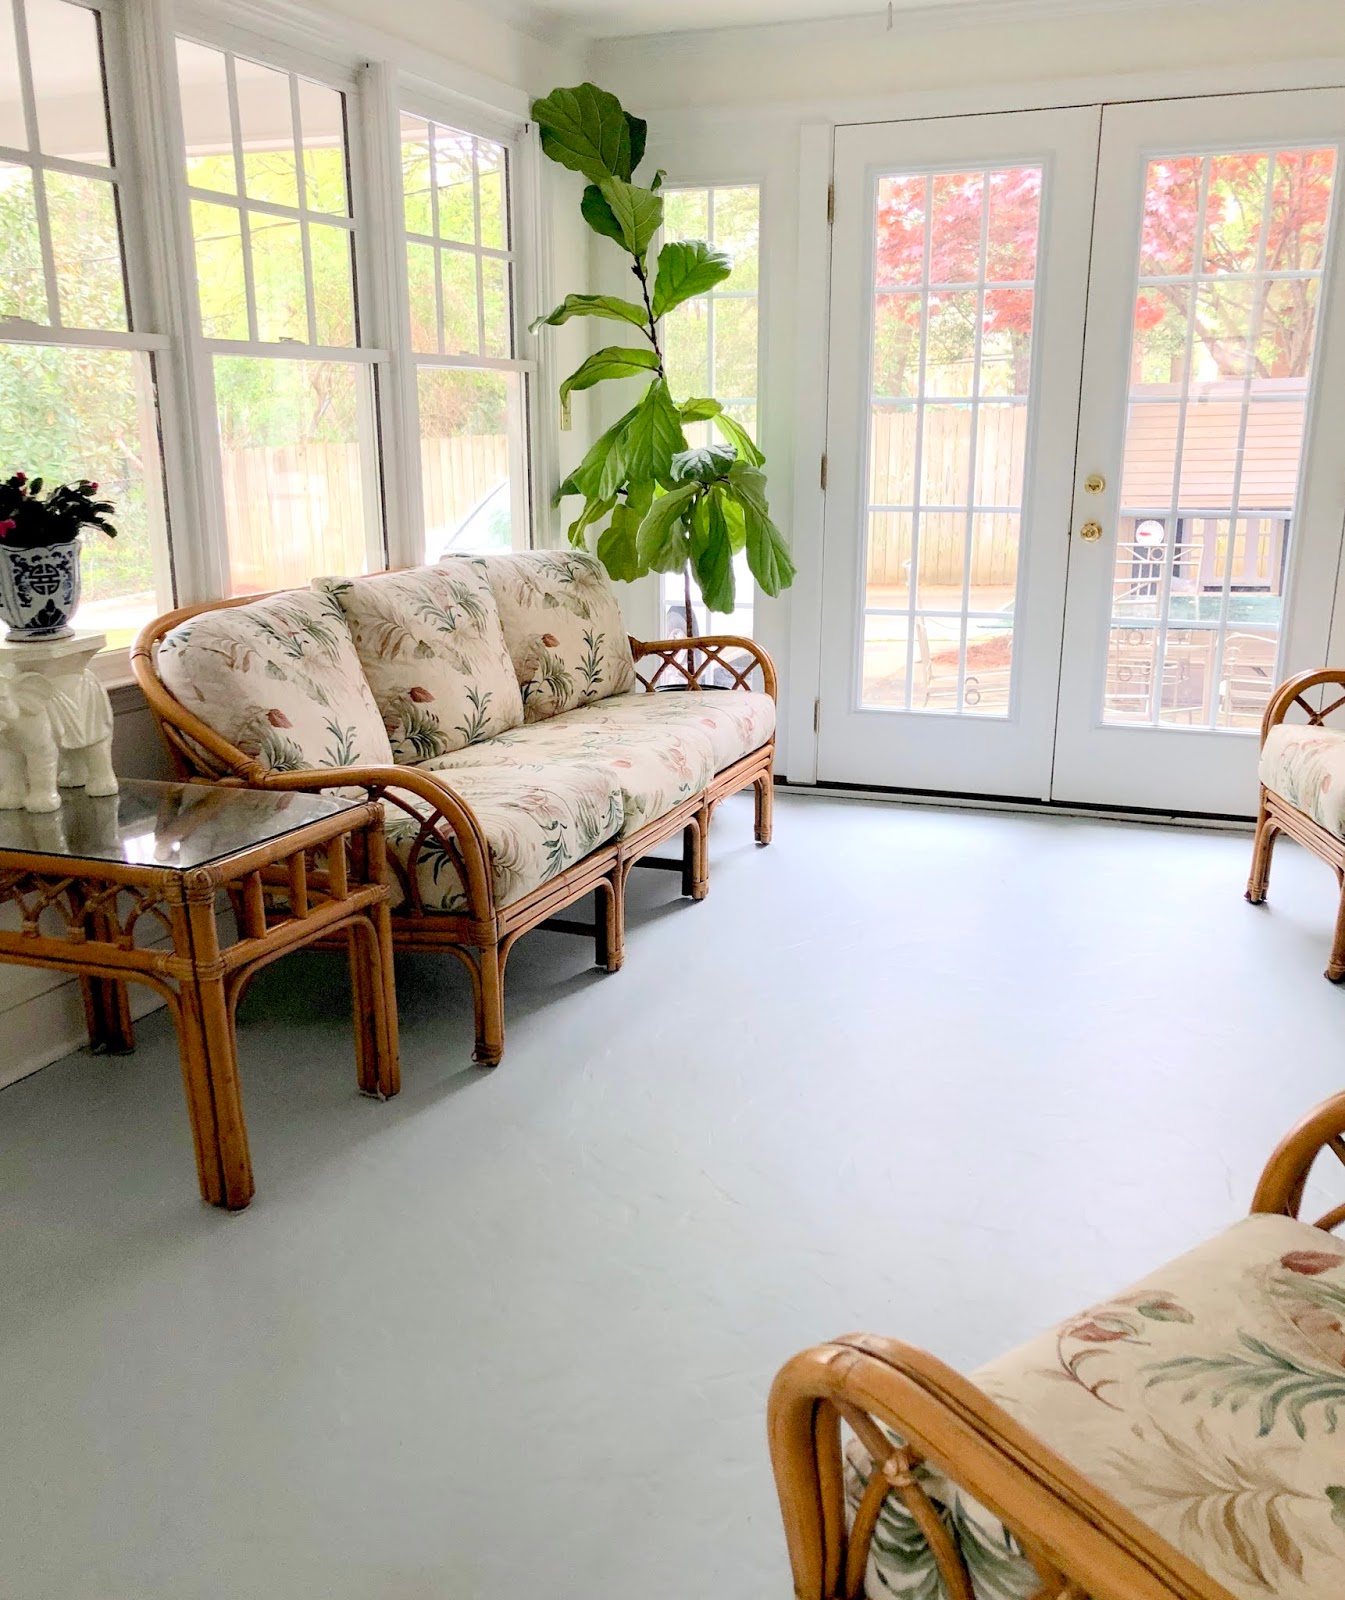
Both of the homes we've owned had sunrooms (very popular in midcentury homes) and a huge selling point for us.
I love a space that has lots of windows to enjoy the view of the outdoors with the comforts of indoors.

I'll start with the room transformation that shines the brightest, our sunroom ...

White Washed Brick

I love that our late Scragley is in this picture
Our sunrooms were his favorite too

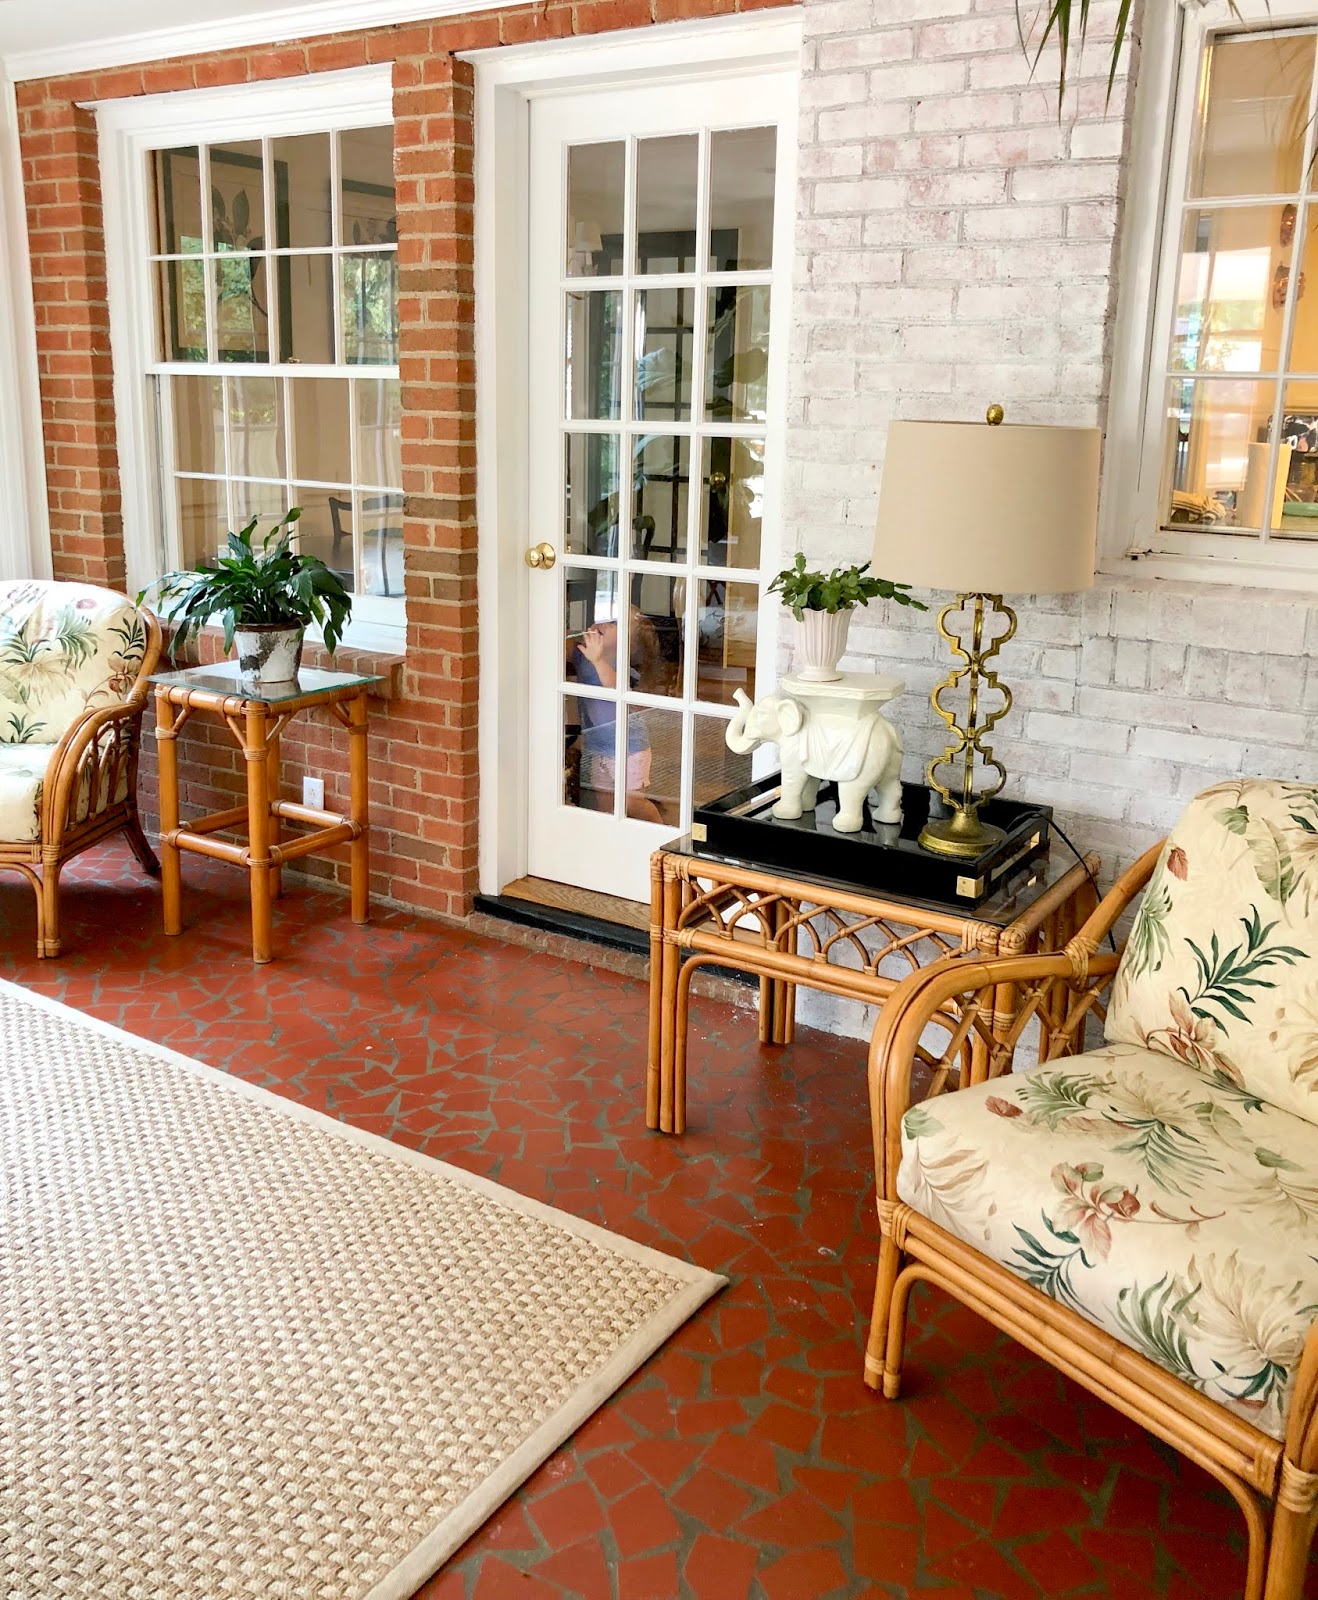
I love the exposed brick exterior wall but it's just so red (my LEAST liked color for home design).
I waited a year before doing something about it as I wanted to be confident before altering the brick as you can't undo it!


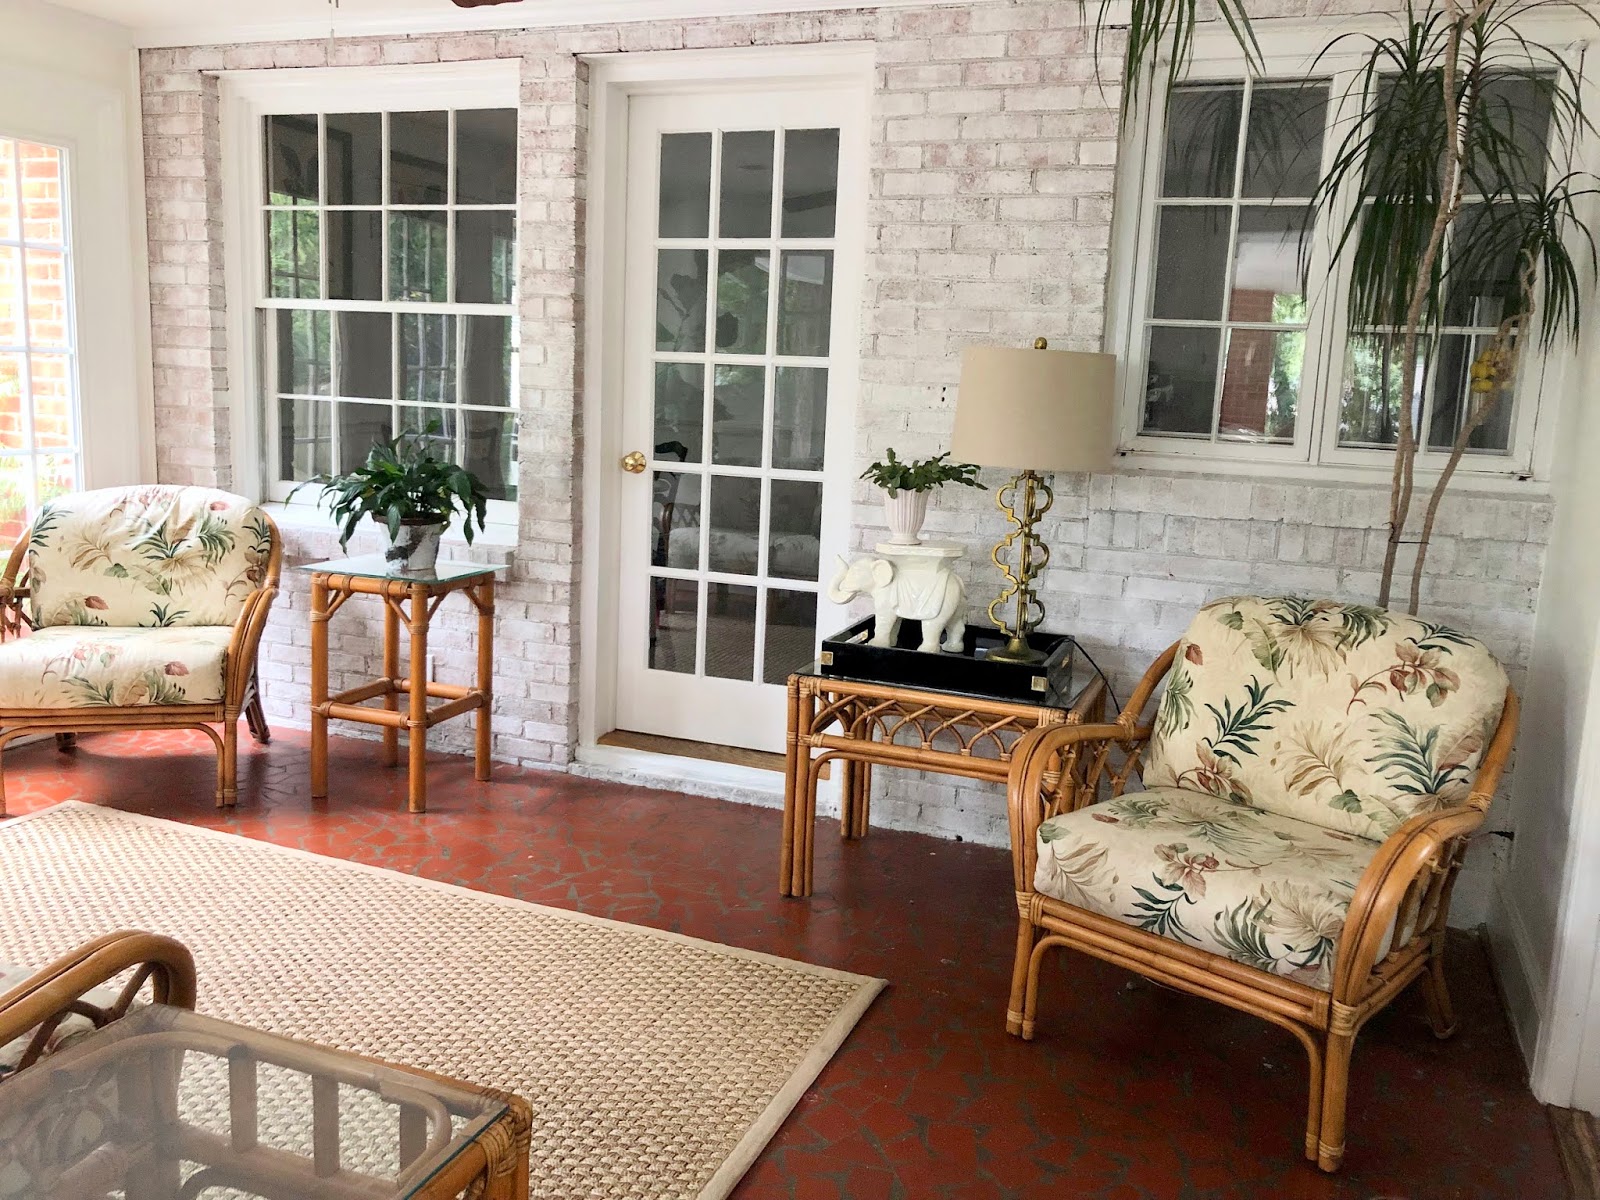
I decided on a white wash so that we didn't loose the look of the brick that using solid paint would do and I don't like smearing/distressed techniques as they feel messy to me.
I did what I was supposed to do and consulted Pinterest and Youtube before jumping in.
They lied on it's simplicity and ease. 
It was a MESS!

I ended up diluting white paint we had left over from our powder room and found that trying to measure according to the tutorials I watched wasn't giving me the results I wanted so I just diluted to a consistency that gave me what I was looking for. The brick had variations of colors that I truly wanted to showcase. I wanted a cohesive thin white covering that let the underneath shine through.


Ta Da!

White washing the brick lightened the room dramatically! And I didn't loose the textured element of the brick wall. 
The floor was covered in splatters and I was tired but all worth it.

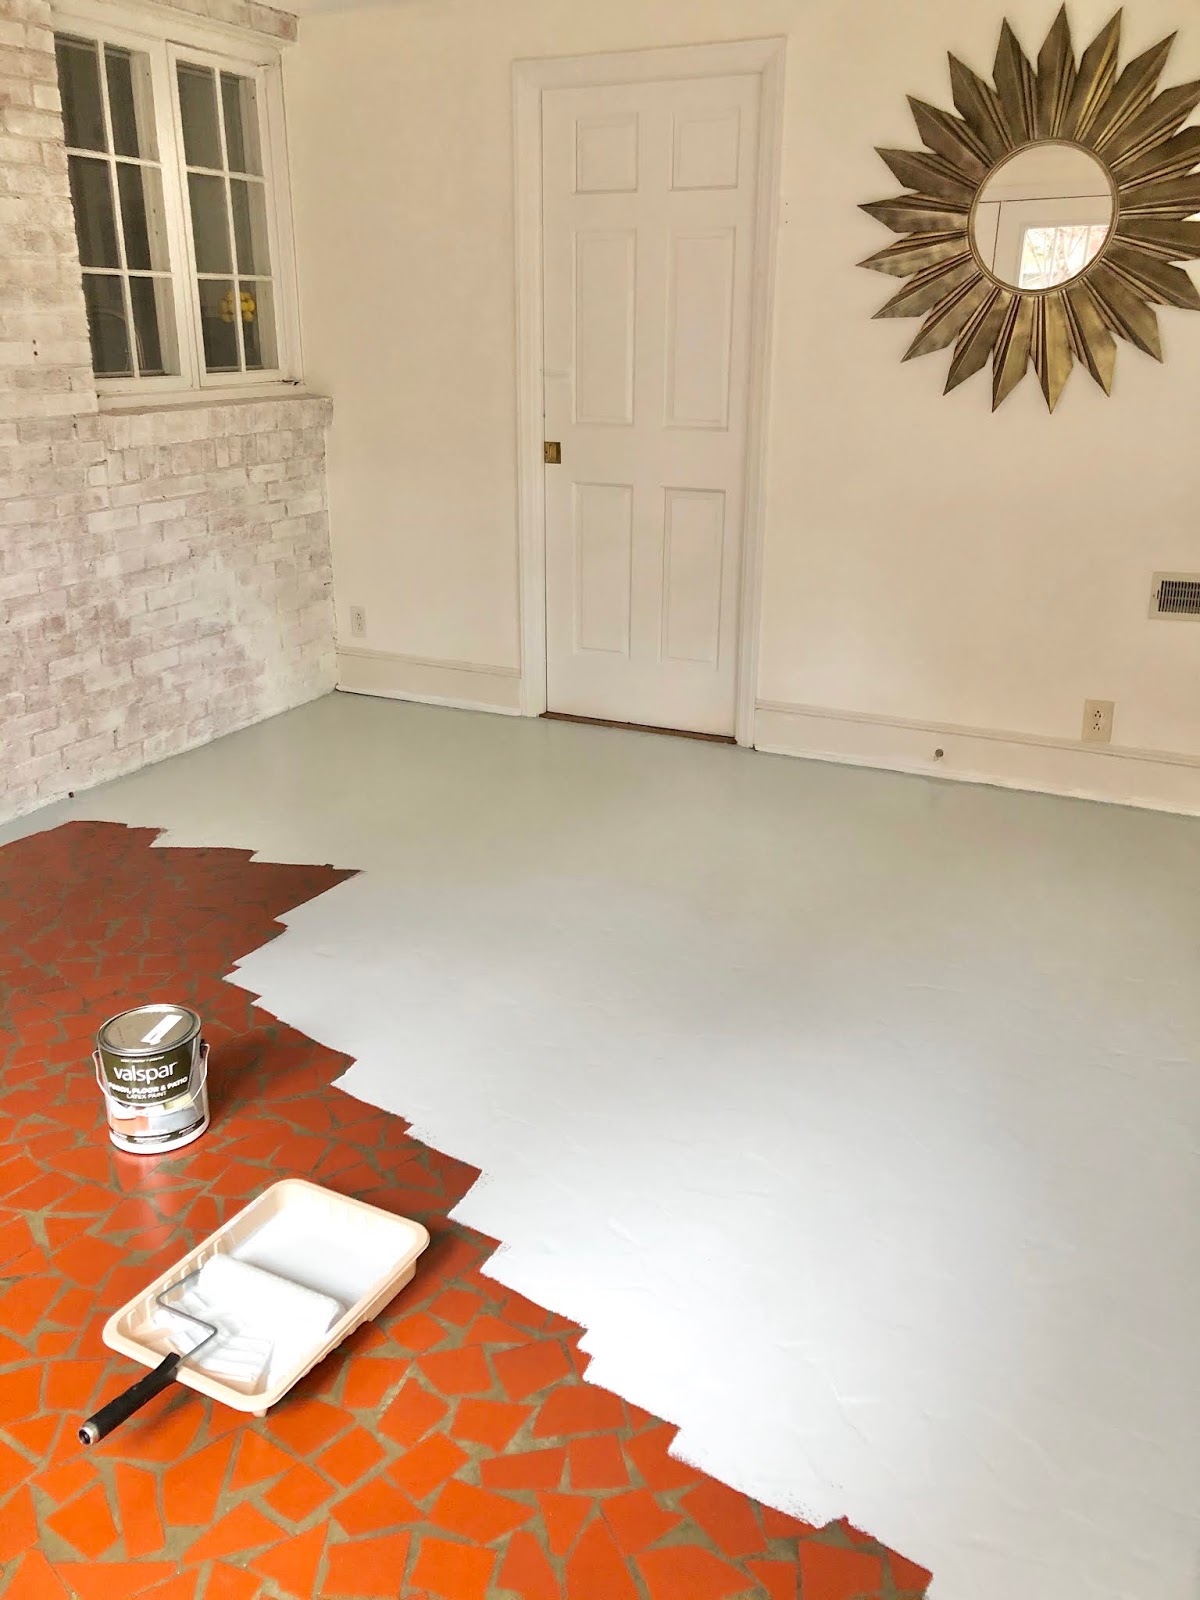
Now I REALLY had to do something about the hideous floor!

Painting Concrete/Mosaic Floors


Our plan for this floor is to add new tile.
We want to make sure the tile we choose is cohesive with the overall design of our home so we are holding back with our selection.  We also want to renovate multiple rooms at a time which is a cost savings but also takes more time. 

I just could NOT look at this horrendous floor (I couldn't hate it more) any longer so I made a run to the hardware store and slapped some paint on it one morning while Vivian was in school.


It was so easy! Thank goodness, after white washing the brick I was discouraged at every doing another project.

The only negatives are that high heels and other rough objects will scratch it off and it shows dirt terribly. It's doesn't help that it's a solid color and our highest traffic area from the outside. 


And just when I thought the white wash brightened the room, the floor paint took it to a whole new level!!!

I can't decide if I prefer the rug or no rug

I am beyond please with the look.
However, tile will be a much better solution long term and now I have an idea of where I want to go with color and pattern. 


We removed the door from this room leading into our home and I rearrange the furniture and decor all the time 
We plan on adding a new fan and reupholstering the cushions in a fun pattern! Similar to this citrus design.


Just as we as humans are works in progress, so are our homes.  There's no such thing as perfect but any space with us in it is perfect for me!

White Wash Color - Benjamin Moore Chantilly Lace  | Floor Paint - Color Slate Stone

Dress Your Rooms Beautifully with Bright Paint
And don't forget plants!

XOXO Sarah-Louise